Wednesday, April 3, 2013

Brewing Budget Friendly

For me, brewing has to stay budget and space friendly.  I tend to do a bit of research prior to buying anything, then make a decision that will work for me at the cheapest price.  Sometimes I am right, and sometimes I should have went with the higher initial investment.

Here is how I brew without breaking my bank.

1) Water.  Water can get expensive if buying bottled water.  For some, water straight from the tap is fine.  You may choose to get your water tested for minerals, chemicals, and ions.  If so, here is a tip: most pool supply stores will test your water on the spot for no charge.  Maybe you have to tell them that it is for the purpose of a backyard pool or spa.  As long as you are okay with that little fib it is a pretty risk free endeavor. 

My household water has a very high ppm of chlorine, moderate Ca+, but low bicarbonate.  The activated charcoal filter in my fridge does a good job removing Cl-, and the rest I adjust with a tiny bit of chalk.  I fill up these bottles the night before brewing.

2) Stove top water heating.  I know that for each brew I need somewhere around 3.5-4.5 gallons of strike water, 1.5-2 gallons for mash-out, and 3-4 gallons for sparging.

I use a 20 quart SS kettle for the strike and sparge waters, and my 42 quart kettle for my mash-out water.

Warming this water my stove top saves me the propane.


3) No fancy brew kettles.  Yes, there are some nice kettles out there.  They are also pricey.  I can see why they are handy to have; with thermometers, drain valves, and other features.  For the budget brewer there are other options. I went with this one.  It is functional.  However, it was very dirty upon arrival.  It took many hours of scrubbing with steel wool to remove all of the nasty oils and grime.  After that I boiled water in the bottom and used the steam to really bust up the residual aluminum dust/black crap.

I also own a stainless steel one, mentioned in point 2.  I can see why stainless is generally better than aluminum, but it also costs about twice as much volume for volume.

The down side to a basic 42 quart kettle with no drain valve is that once the boil is done, and the wort is cooled, I have to pick up 6 gallons of still warm liquid and dump it into my fermentation bucket.  So far I have not spilled any, but one slip could ruin the day.


4) Basic outdoor propane burner.  Being an open air brewer has some challenges.  Uncooperative weather is the biggest.  While I have brewed in the snow with no noticeable impact, wind is my biggest enemy.  I read many people say that this burner was wind resistant.  It is also one of the least expensive basic burners.  So far my experience has been generally positive.  The flame sits down in a semi-enclosed area.  Unless the wind gusts to around 20 mph or more the flame stays lit.

My only word of caution if using this burner is to crank it up high once or twice for a good 15 minutes and let the paint melt away.  It is probably highly poisonous to breath that paint smoke, so crank it up for a bit far away from your breathing air.  I commend this so the paint does not melt (and it will) while you have beer boiling.

5) Plastic buckets/carboys.  These are cheap compared to metal/glass and serve the same purpose.  I don't see much merit in comparing glass carboys to plastic buckets.  There are pros and cons of each.  This is all about getting into the brew world, and making good beers, on a budget.

This combo works well for me.  The bucket is easy to pour my cooled post-boil beer in, blocks most of the harmful UV rays (when exposed), and is very easy to clean.

The plastic carboy is used for my secondary conditioning.

Beyond these items I really started saving more money as I went to all grain brewing, and my product has improved.

What I did not mention in this post was reusing yeast.  I have not yet attempted to reuse yest, although I have collected and washed yeast for use.  I will save that for a future post.
I also did not talk about what to do after the beer is done.  I think kegging beer is probably cheaper in the long run.  Saving bottles, buying caps, buying sugar and other supplies adds up over time.

And that is how I brew beer without going broke. 

Wednesday, March 27, 2013

Building a Mash Tun

In my last post I mentioned (although withheld the awful details) melting my mash tun.  While that particular mash tun did the job, I immediately realized a few oversights.  I'll spare the specifics, but I wasn't too heartbroken about having to make a new one.  This post is an attempt to help fellow new brewers constructing and operating a mash tun.
Materials:
A) 10 gallon Rubbermaid water cooler. ~$50.  The cooler pictured is the "Home Depot" brand.  Notice that the tap has been removed and the rubber grommet is still in tact.
B) Teflon tape ~$2
C) Framing wire. ~$3 Galvanized steel.  Used to add inner support to the mesh tube.  Can be dirty with grime from manufacturing process. Wash with soap and hot water.
D) Extra rubber washers, assortment. ~$3
E) 3/8" FIP x 1/4" FIP connector (x2) ~$5 each
F) 1/2" washer (x5) ~$0.35 each
G) 3/8" MIP "close" (x1 or 2) ~$5 each
H) 1/4" MIP "close" (x1) ~$5
I) 3/8" MIP 1 1/2" (x1 or zero) ~$5 each *buy one G and one I or two Gs or two Is.
J) 3/8" FIP (both ends) valve + 3/8" MIP threaded hose  barb (x2) ~$8 for valve, ~$5 for barbs.
K) Bathroom sink hose, stainless steel mesh coated ~$15
L) "T" vinyl hose barb ~$3
other L) Hose ~$8

Steps:

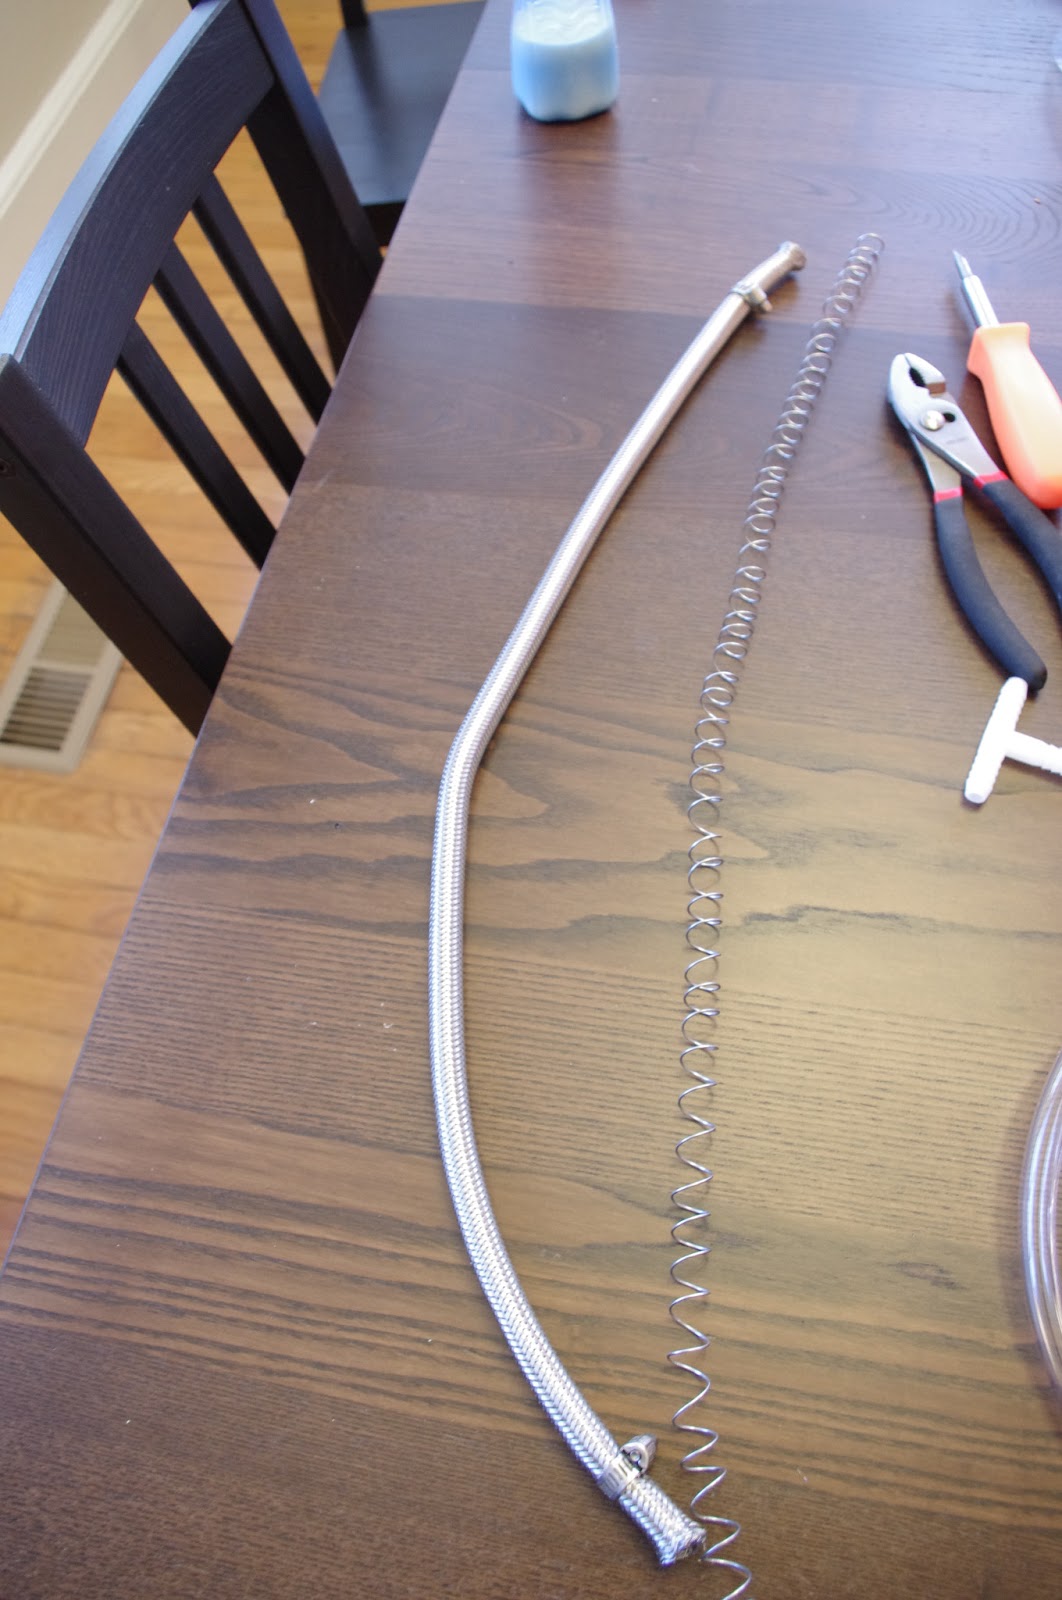
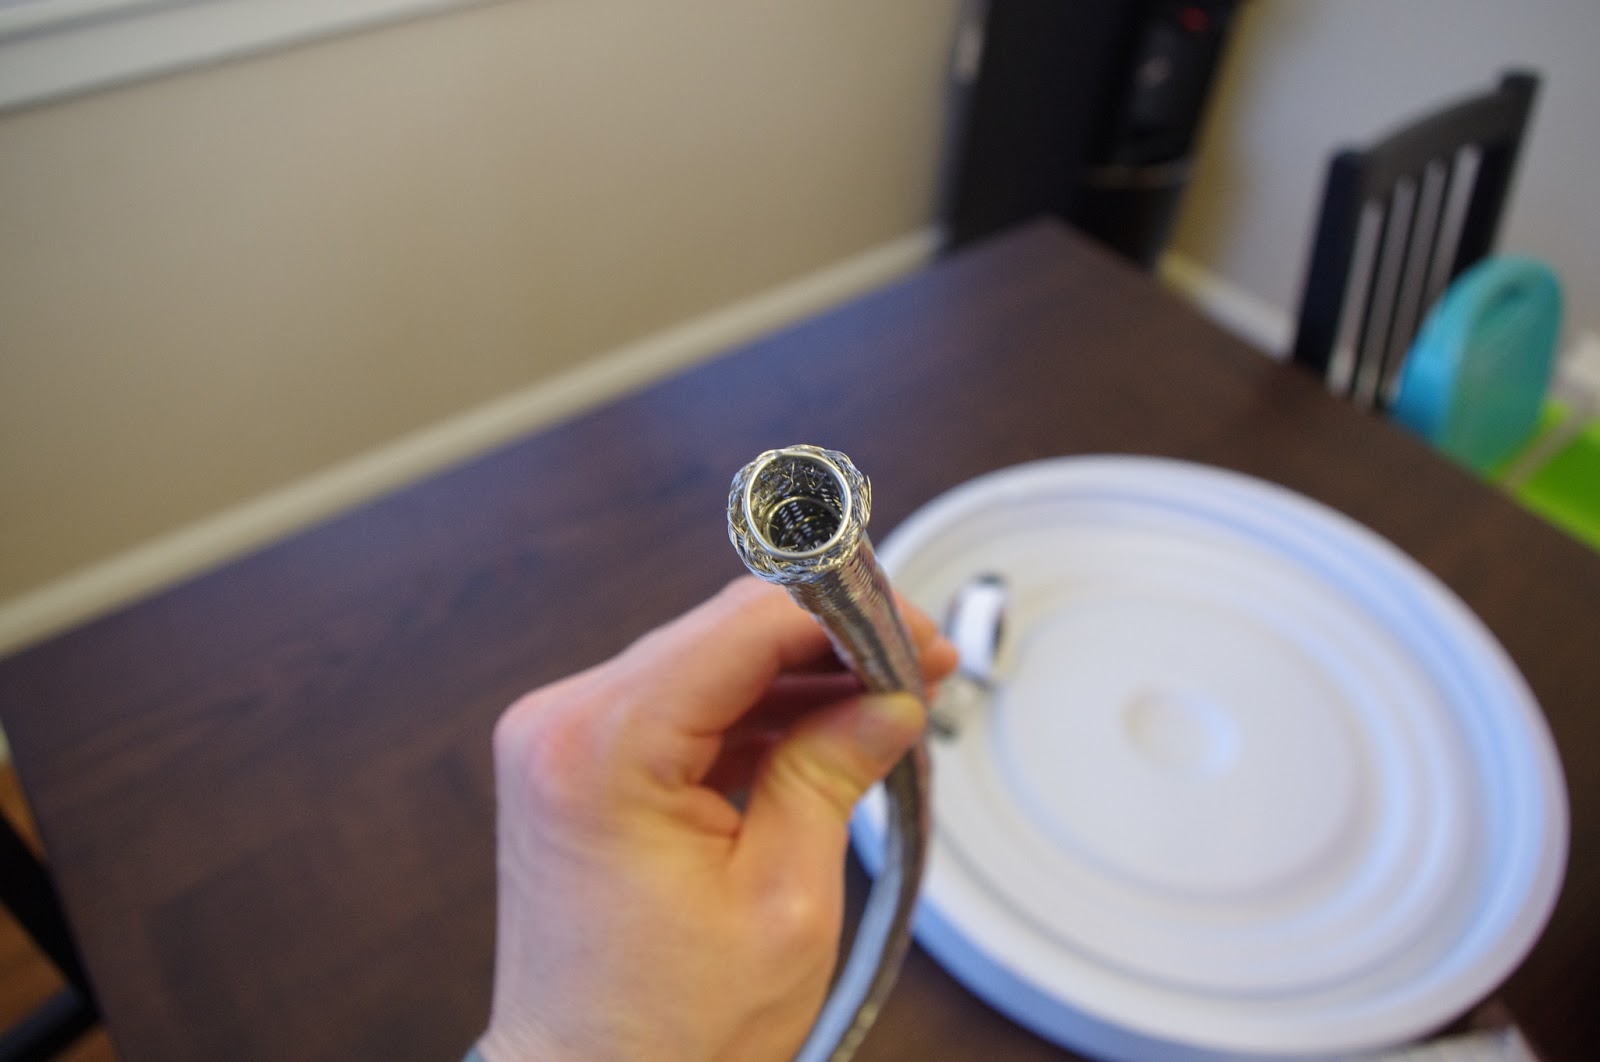
1)Wind the framing wire around a pen or marker, then gently feed it through the steel mesh that you removed from the sink hose.  Did I mention to remove the mesh from the sink hose?  Yeah, do that too.


2) Wrap threads with the teflon tape and assemble them to create the valve structure, inside and out.
That picture is blurry, sorry, but from left to right it is: hose, hose barb screwed into valve,  3/8" FIP x 1/4" FIP connector screwed into the valve, 1/4" MIP nipple. Gap.  3/8" FIP x 1/4" FIP connector, 3/8" MIP nipple, 3/8" FIP hose barb, hose.

You may be asking, "Jim, why use the 1/4" MIP nipple and connectors and not just run the 3/8" nipple straight from the valve to the hose barb?"  The answer is, the 3/8" MIP nipple is to big to run through the rubber grommet and washers.  Thus, I had to down step the pipe that passed through the hole on the cooler.

3) Screw the two pieces together.  Use washers to add strength and water-tight integrity on both sides of the hole.  Look closely at the left picture to see how many washers I had to use to seal the gaps.


4) Attach the mesh manifold.  If you look closely you will see that I did not clamp the hose down between the brass and nylon hose barbs.  I did that for cleaning purposes.


Now that the mash tun is complete, let's try it out.

1) Add grains.


2) Hot water.


3) Drain.  If you look under the valve you can see that the seal is not perfect.  But with ~6 gallons of very hot water inside for that long, this is an acceptable loss.


Mission complete!

Stop back later to see how this beer turns out.

Thursday, March 14, 2013

ON TAP: Junkyard Dog

Now on tap, Junkyard Dog.  An American pale ale.  The name was inspired by a couple bags of extra hops I had sitting around.  Trying to stay budget friendly with this batch of beer I used up scraps on hand.

The characteristics I wanted to impart was golden color, an American wheat beer body, and a thick, aromatic head.

The hops used, 1/2 oz. Galenea added at boil, and 1 oz. added at 10 mins and 5 mins, both gave a nice mixture of citrusy, almost grapefruit flavor, and pine notes.

I used 9 lbs. US 2-Row Pale malt, 1 lb. Cara-Pils, 1 lb. Biscuit malt, and 1 lb American Wheat.

This production was standard to my current technique of a single rest mash at ~152 dF for 60 minutes, which had some natural temperature fluctuation, ~167 dF mash out for 15 minutes, and a single sparge at ~171 dF.  Note: the mash tun that I originally built (not documented anywhere), which used a CPVC manifold, was destroyed in the process - details withheld due to embarrassment.

From a 60 minute boil I finished with just under ~6 gal of wort.  Since my kettle does not have a drain valve, and I rely on the ol' dump and strain method into my fermentation bucket.  I allot for a greater total volume to compensate for kettle loss.  In the future I will either modify my kettle to allow for straight gravity draining or invest in a new kettle (I'll also get some conicals, and eventually a 1bbl, and maybe my own awesome brewpub).  For now, this is how I make it work. 

I used White Labs 006 American Ale blend.

Fermentation was slow for the first 60 hours and became very vigorous after 72 finishing ~6 days later.  At first I was concerned with my choice of location.  I recently moved my supplies out of an interior closet, which was ~70 dF but varied with the outside temp due to drafty doors and poor floor insulation, into my furnace room which is all concrete/brick sitting 3 ft. below ground level.  This spot held the beer at a steady 64 for ten days.  On day 10 I moved the carboy into my keezer to cold crash for 3 days prior to kegging.

Some may argue 13 days is a short turn-around.  My response is simply, brewing is a new adventure to me.  I lack the patience and experience to let beers sit around forever.  Cranking out batch after batch with short feedback timelines is probably more beneficial to learning than brewing sequential batches without drinking it all the opportunity to test the product before moving on.

At the end of the day, this is a nice, refreshing, good to the last drop ale.  My wife, who is extremely unfiltered in her critiques, says it reminds her of Sam Adams Cherry Wheat, minus the Cherry.  After a few glasses, I concur.

Cheers!


Saturday, March 2, 2013

UNDER CAP: Olde Rich Bitch


Olde Rich Bitch is the first beer where I worked out the recipe, mashed the grains, and took a leap of faith.

The concept was an English style porter, with a dark, but not completely opaque, color and roasted body.  To that I added coffee, chocolate and other natural adjuncts.

Sticking with my dog theme I gave it the name Olde Rich Bitch.  The inspiration is the stereotypical old rich bitch who likes her coffee, chocolate, and beer.  Fitting, I think.

The resulting product is a wonderfully delicious porter, with all the characteristics of a professionally brewed beer.  The aroma is rich, unadulterated coffee which follows into a brilliantly smooth flavor balanced with distinct, but mild chocolate.

What worked for me is adding whole coffee beans, and the unsweetened dark chocolate bar into a steeping bag.  I steeped that the last 15 minutes of my boil and left it in all the way to transferring to my fermentation bucket.  I was cautioned before doing this that it probably would not work, but it did.

The only fault with this beer is there are still a lot of coffee particles in suspension; similar to the particles after drinking a nice french press coffee.  Some of these particles collect and form a ring around the neck of the bottle.

All in all this is a fantastic beer, and a great success for my first all grain!


Sunday, February 24, 2013

ON TAP: Can't Sett'er down.

Now on tap, Can't Sett'er down - MRB Traditional Irish Ale.


This Irish red ale was brewed for the upcoming St. Patrick's day.  St. Patty's day has always been a fun night for drinking.  Besides the obvious pint of Guinness Extra Stout, the choice beverage of many is the Irish red.

Traditionally, amber-red ales brewed in Ireland were sweet and predominantly malty, with a strong aroma and a smooth, dry, nutty mouth-feel.  The variety between Irish reds  comes from balancing the malty base with a range of mild hoppy undertones to sharp, floral, and citrus top flavor.

Like it or not, the de facto American Irish red ale is George Killian's Irish Red, now owned and brewed by Coors.  It is widely distributed, dirt cheap ($5.25/6 pk.) and extremely consistent across batches.  I describe the aroma and taste as more lager than ale.  There are plenty of reviews of Killian's here and here.

I set out to brew a sweeter, more malty, full body ale using geographical appropriate ingredients.

I started with 10 lbs. Golden Promise, 7 oz. CaraMalt 20L, 7 oz. CaraMalt 60L, and 3 oz. roasted barley.

For bittering hops I used 1 oz. East Kent Goldings, and 1/2 oz. UK Fuggles in the last 15 minutes of a 60 minute boil.

That's it, buddy.  No other flavoring besides the yeast.  For that I used White Labs Irish Ale yeast.

As you can see, my ale is a blunted dark amber, cloudy, with a moderate head.  The aroma is a malty with a bit of a fresh baked bread scent.  It feels great in the mouth, with a excellent balance of malt and light hops.

It is good; delicious even.  I just can't sett'er down.

Predicted measurements SRM = 12  IBU = 22.3  ABV = 4.1%


Update: This beer is now gone.  It was just over 2 weeks ago that I kegged this beer (I did share a good amount).  Before the keg was empty, or in other words ~10 days after kegging, this beer became extremely clear.  It was absolutely delicious.  It went from a yeasty character to a well balanced red, that was truly hard to stop drinking.  Plus, the intoxication factor was tremendous.  Three pints of this and it was "feelin' good time".

I do not know if I would change a thing if I were to brew this again, other than maybe letting it sit undisturbed for 3 weeks.  I probably rushed it.

Building a Keezer

Being new to home brewing, every day comes with a new lesson.

Even the most common John out there is familiar with the word "kegerator", but fewer are familiar with the word "keezer".  It is simply using a deep freezer as a cooling chamber for holding kegs.

This blog post is about how I made my keezer.  The construction is not unique.  The guys at my local home brew shop (LHBS) were happy to share their design with me; they probably learned it from another home brewer who shared it with them.  But, just in case there was not a solid tutorial out there, here is my experience.

Parts needed:
2 - 2x6 (~$5/ea. @ Lowes)
~15 ft. 2-sided sticky weather strip (~$3.50 @ Lowes)
~8 cu.ft. freezer (~$180-250)
1 - Kegging kit (~$200 @ LHBS)
1 - Corny keg (~$55 @ LHBS)
1 - Johnson Controls A419 (~$50 @ Amazon.com)

The idea is simple.  Extend the height of the freezer, attach spigot for dispensing beer without drilling through the freezer wall, regulate temperature to keep kegs cold but above freezing.

Temperature Regulation:
The easiest, safest, surest method of regulating temperature is with the addition of a Johnson Controls A419, or similar.  To use this you plug it into the wall, plug the freezer into the female side, put the temperature probe in the freezer, and set your desired temperature.  This device will cut power to your freezer when too cold, and allow power when too warm.

Another method is to tinker with the thermostat.  This requires 1) finding the thermostat, 2) exposing thermostat, 3) "coarse" adjusting thermostat to raise lowest temperature to about 40 degrees F.   This guide (CLICK HERE) is a good reference.  Depending on your model freezer and your skill as a tinkerer, it may be easier to go with the Johnson Control A419. UPDATE: While I originally thought that my tinkering skills were good, this thermostat constantly defied me.  One day it would appear to be a good temp all day, the next my beer was slush.  I decided to buy the A419.

As I adjusted it, over the course of a couple hours, I left a thermometer inside the chest to get an idea of the ambient air temperature.

Again, I thought I had this figured out, but in the end, it did not comply.  Plus, it's a good thing I have skinny arms, because it was a damn tight space.

If you have big hands/arms, you may want to just go for the extra $50.

Removing the lid, assembling the frame, and applying the weather stripping was quite the easy task.


I left a gap in the corner for the CO2 line and temperature probe to pass under the wood frame.


Once that portion was complete I screwed the lid back onto the wooden frame, and installed the spigot.
 
The A419 has 2 mounting options, either use screws with some exposed head-space to bracket the control box to a surface, or a chain to suspend it like so:

The copper wire you see is actually a capillary tube.  It is hallow, and filled with gas.  Sharp bends will completely ruin it, also the instructions state do not rest it against an abrasive surface.  Constant friction will degrade the capillary wall eventually causing a loss of function.

Be careful when bending and extending the capillary tube.  It is soft and delicate.

It is very easy to adjust the temperature with a simple analog dial.


The capillary tube is rigid enough to support the weight of the temperature probe, as long as it is not often bumped or jostled.

The temperature probe should not be in contact with any freezer surfaces, just the air.

I set my freezer thermostat to exactly it-doesn't-matter, because it doesn't matter.  The A419 will do the rest.

Since installation my keezer has been very stable and a great place to store bottled water, recovered yeast, and other beers!

Happy brewing!